
Baking with Marie Callender’s pie crusts offers convenience for creating delicious pies with ease․ These instructions provide a simple guide to ensure a perfectly baked crust every time․ From thawing to baking, these steps will help you achieve a golden, flaky crust, ideal for both sweet and savory pie recipes․
Marie Callender’s pie crusts have become a staple in many kitchens, celebrated for their flaky texture and convenience․ These ready-made crusts offer a consistent base for both sweet and savory fillings, allowing home bakers to create delicious pies with minimal effort․ The brand is well-known in the world of pies and baked goods, providing a hassle-free solution for those who may find making pie crust from scratch intimidating․
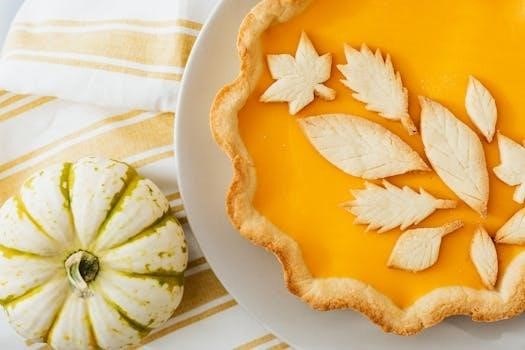
The appeal of Marie Callender’s pie crust lies in its simplicity and versatility, attracting both beginner and expert bakers alike․ With made-from-scratch crusts, these shells offer a great foundation to apple, pecan, lemon meringue, and many more pies․ The crusts are crafted to deliver a homemade taste and appearance, making them a popular choice for family gatherings, holidays, and everyday treats․

Whether you’re a seasoned baker or just starting out, understanding how to properly use a Marie Callender’s pie crust can significantly enhance your baking experience․ By following simple instructions, you can unlock the potential of these crusts and create pies that rival those made from scratch․ These pie crusts are designed to help you save time and focus on creating a perfect pie every time․
Ingredients of Marie Callender’s Pie Crust
Marie Callender’s pie crust achieves its signature flaky texture and rich flavor through a carefully selected blend of ingredients․ The primary components include enriched wheat flour, which forms the structural base of the crust․ This flour is typically enriched with essential nutrients such as niacin, reduced iron, thiamine mononitrate, riboflavin, and folic acid, contributing to both the crust’s texture and nutritional value․
The fat content, crucial for flakiness, comes from a combination of soybean oil and hydrogenated soybean oil․ These oils contribute to the crust’s tender layers, creating pockets of air during baking that result in a flaky, melt-in-your-mouth texture․ Water is another essential ingredient, binding the flour and fats together to form a cohesive dough․
Dextrose, a type of sugar, is added to enhance the crust’s flavor and promote browning during baking, giving it a golden-brown appearance․ Salt is also included to balance the sweetness and enhance the overall taste profile․ These carefully balanced ingredients work together to create a pie crust that is both delicious and easy to use, making Marie Callender’s a favorite among home bakers․
Thawing Instructions for Frozen Pie Crust
Proper thawing is crucial to ensure your Marie Callender’s frozen pie crust bakes evenly and achieves the desired flaky texture․ Begin by removing the pie crust from the freezer․ There are two primary methods for thawing⁚ the refrigerator method and the room temperature method․
For the refrigerator method, place the frozen pie crust in its packaging in the refrigerator for approximately 4-6 hours, or preferably overnight․ This slow thawing process helps maintain the crust’s structure and prevents it from becoming too soft or sticky․
If you need to thaw the crust more quickly, the room temperature method is suitable․ Remove the crust from its packaging and let it sit at room temperature for about 15-20 minutes․ Keep a close watch, as thawing time can vary depending on the ambient temperature․ The crust should be pliable but still cold to the touch․ Avoid thawing it completely, as this can lead to a sticky and difficult-to-handle dough․ Once thawed, gently unroll the crust and proceed with your pie recipe, ensuring to prick the bottom with a fork to prevent bubbling during baking․
Blind Baking Instructions
Blind baking is a technique used to pre-bake a pie crust before adding the filling․ This is particularly useful for pies with fillings that don’t require baking, such as cream or custard pies, or when you want to ensure a crisp bottom crust; Start by thawing your Marie Callender’s pie crust according to the thawing instructions․
Once thawed, gently unroll the crust and place it into your pie dish․ Crimp the edges to create a decorative border․ Next, prick the bottom of the crust several times with a fork to prevent it from puffing up during baking․ Line the crust with parchment paper or aluminum foil, pressing it gently against the bottom and sides․ Fill the lined crust with pie weights, dried beans, or rice to weigh it down and maintain its shape․
Preheat your oven to 375°F (190°C)․ Bake the crust for 15-20 minutes, then remove the parchment paper and weights․ Return the crust to the oven and bake for an additional 5-10 minutes, or until it is lightly golden brown․ Let the crust cool completely before adding your filling․ This ensures a perfectly crisp and stable base for your pie․
Baking Instructions with Filling
After preparing your Marie Callender’s pie crust, the next step is baking it with your chosen filling․ This process ensures that both the crust and filling are perfectly cooked, resulting in a delicious homemade pie․ Begin by preheating your oven to the temperature specified in your pie recipe, generally around 350°F (175°C) to 375°F (190°C)․
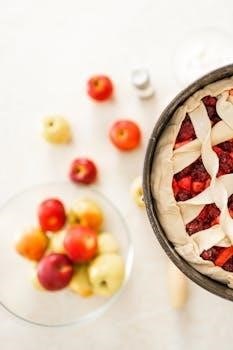
Carefully pour your prepared filling into the pie crust․ If your recipe includes a top crust, gently place it over the filling, crimping the edges to seal․ Cut a few slits in the top crust to allow steam to escape during baking, preventing the crust from becoming soggy․
To prevent the edges of the crust from burning, cover them with aluminum foil or use a pie shield․ Place the pie on a baking sheet to catch any potential spills․ Bake for the time specified in your recipe, usually 45-60 minutes, or until the filling is set and the crust is golden brown․ Let the pie cool completely before serving to allow the filling to fully set and the flavors to meld together․ Enjoy your homemade pie with Marie Callender’s crust!
Tips for a Flaky Crust
Achieving a flaky pie crust with Marie Callender’s pastry shells involves a few key techniques․ First, ensure the crust remains cold throughout the preparation process․ Cold fat creates steam when baking, resulting in those desirable flaky layers․ When thawing, do so briefly to keep the butter solid․
Before baking, consider chilling the crust for an additional 15-20 minutes․ Prick the bottom of the crust with a fork to prevent it from puffing up unevenly․ For an extra golden and flaky finish, brush the crust with an egg wash (a beaten egg with a splash of water or milk) before baking․
When placing the pie in the oven, ensure it is preheated to the correct temperature․ Baking at a slightly higher temperature initially can help the crust set quickly, further promoting flakiness․ Keep a close eye on the crust during baking, and if the edges start to brown too quickly, use a pie shield or aluminum foil to protect them․ These tips will help you achieve a perfectly flaky crust every time․
Preventing a Soggy Bottom Crust
A soggy bottom crust can ruin an otherwise perfect pie․ To prevent this, several strategies can be employed․ Start by blind baking the crust before adding a wet filling․ This involves pre-baking the crust partially or fully to create a barrier against moisture․
Before adding the filling, brush the bottom of the crust with a thin layer of melted chocolate or a beaten egg white․ These create a waterproof seal․ Another technique involves sprinkling a layer of finely ground nuts or cookie crumbs on the bottom of the crust to absorb excess moisture․
When baking, place the pie on the lowest rack of the oven to ensure the bottom crust gets sufficient heat․ Using a preheated baking stone or baking sheet can also help cook the bottom crust more evenly․ If you notice the top crust browning too quickly, cover it with foil while allowing the bottom to continue baking․ Ensure your filling is not overly liquid and consider thickening it slightly with cornstarch or flour․
Troubleshooting Common Problems
Even with careful preparation, baking pie crusts can sometimes present challenges․ One common issue is a tough crust, often caused by overworking the dough or using too much water․ To avoid this, handle the dough gently and use only the necessary amount of liquid․ If the crust shrinks during baking, it might be due to gluten development․ Let the dough rest in the refrigerator before rolling it out․
Another problem is uneven browning․ To remedy this, rotate the pie halfway through baking․ If the edges brown too quickly, use pie shields or aluminum foil to cover them․ A cracked crust can occur if the dough is too dry or if there isn’t enough steam in the oven․ Adding a pan of hot water to the oven can help create a moister environment․
If the filling bubbles over, ensure the oven temperature is accurate and consider using a baking sheet lined with foil for easy cleanup․ A soggy bottom crust, as previously discussed, can be prevented with blind baking and moisture barriers․ Addressing these issues proactively will help ensure a successful and delicious pie․
Serving and Storage Suggestions
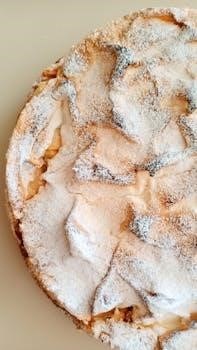
Once your pie is baked to perfection, proper serving and storage techniques are essential to maintain its quality․ Allow the pie to cool completely before slicing to prevent a messy filling․ For warm pies, a slightly warm temperature enhances the flavors, while cold pies offer a refreshing treat․ Serve with accompaniments like whipped cream, ice cream, or a dusting of powdered sugar to elevate the experience․
To store leftover pie, cover it loosely with plastic wrap or foil to prevent it from drying out․ Store it in the refrigerator to maintain its freshness, especially for pies with dairy-based fillings․ Generally, a pie can be stored in the refrigerator for up to three days․ If you need to store it for longer, consider freezing it․
To freeze a pie, wrap it tightly in plastic wrap and then in foil to prevent freezer burn․ Frozen pies can last for up to two months․ Thaw the pie in the refrigerator overnight before serving․ Reheat the pie in a low oven to restore its crust’s crispness, ensuring a delightful treat․
Homemade Marie Callender’s Style Pie Crust Recipe
Recreating the flaky goodness of Marie Callender’s pie crust at home is easier than you might think․ This recipe combines simple ingredients to deliver a tender, buttery crust perfect for any pie․
Start with combining all-purpose flour, cold unsalted butter, vegetable shortening, salt, and ice water․ The key to a flaky crust is keeping the ingredients cold․ Cut the butter and shortening into the flour using a pastry blender or your fingertips until the mixture resembles coarse crumbs․
Gradually add ice water, mixing until the dough just comes together․ Avoid overmixing, which can develop the gluten and result in a tough crust․ Form the dough into a disc, wrap it in plastic wrap, and refrigerate for at least 30 minutes to allow the gluten to relax․
Once chilled, roll out the dough on a lightly floured surface to fit your pie dish․ Gently transfer the crust to the dish, trim the edges, and crimp decoratively․ Pre-bake for a golden crust, then fill with your favorite ingredients and bake to perfection, enjoying a homemade pie reminiscent of Marie Callender’s․
Versatile Uses for Pie Crust
Pie crust, whether homemade or store-bought, is incredibly versatile and extends far beyond traditional pies․ Its flaky texture and buttery flavor make it a fantastic base for numerous sweet and savory creations․ Consider using pie crust to make mini quiches, perfect for appetizers or brunch․ Simply cut the crust into small circles and press them into muffin tins before filling with your favorite quiche ingredients․
For a delightful dessert, create pie crust cookies․ Roll out the dough, sprinkle with cinnamon sugar, and bake until golden brown for a sweet treat․ Pie crust can also be used to make savory tarts filled with roasted vegetables, cheeses, and herbs․
Another creative idea is to wrap brie in pie crust and bake it until melted and golden, serving it with crackers or fruit․ For a fun twist, make pie crust pizza by topping the crust with sauce, cheese, and your favorite toppings․ Pie crust is also excellent for making hand pies, filled with fruit or savory mixtures, perfect for on-the-go snacks․
The possibilities are endless, so get creative and explore the many ways you can use pie crust in your kitchen․